Home away from homelab!
Background
I’ve been wanting to extend my homelab capabilities with a server that I can quickly spin up virtual machines on. Proxmox seemed like a logical choice but I was undecided as to which hardware to run it on. Plus I had no idea where to put the machine so that I could have a free power socket for it and also be able to connect it to my home router. On top of that I was a little concerned about fire safety and energy consumption. I mentioned my thought process to a colleague and he suggested I try out a rented server from a company call Hetzner instead of buying my own. This sparked my interest and I decided to give it a go. I still wanted the convenience of being able to directly access the virtual machines from my home network so I went about researching how to create a site to site connection from my home network to a Hetzner rented server. The following is a step by step guide for setting up a wireguard server in a proxmox vm on a Hetzner server and using it to connect to a home network behind a fritzbox.
Preamble
I did not get this working the first time and it took a lot of trial and error to get it working. I also referenced many youtube videos and blog tutorials on my journey :)
Instructions
- Purchase a server from the Hetzner dedicated server auction. Apart from needing to verify your identity this process was is quite straight forward.
- Upload the public ssh key from your laptop and boot into their rescue OS after the order has been processed.
ssh root@<hetzner server public ip>
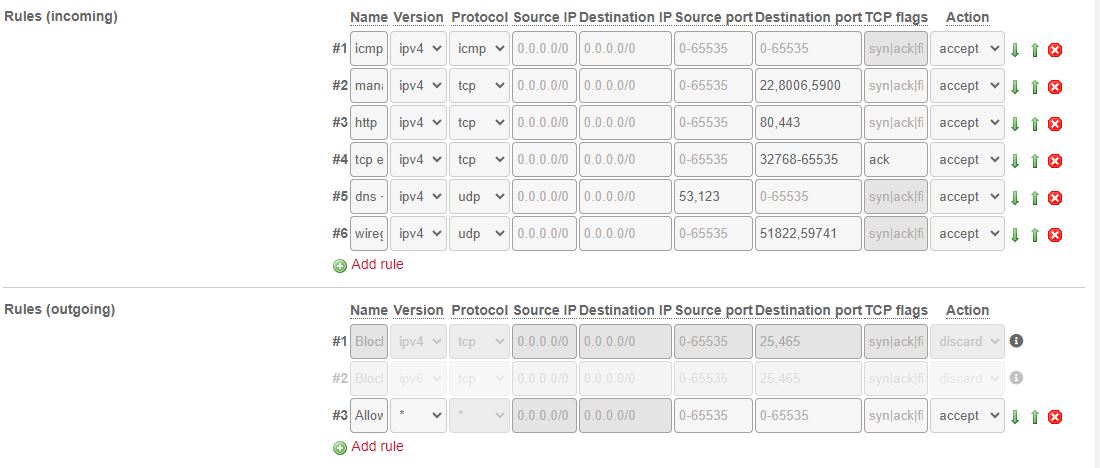
- Login to your Hetzner account and navigate to the firewall settings in the hetzner robot web dashboard and add the rules below.
- ssh onto the hetzner server and install proxmox. (Conveniently Hetzner provides an OS image with proxmox preinstalled).
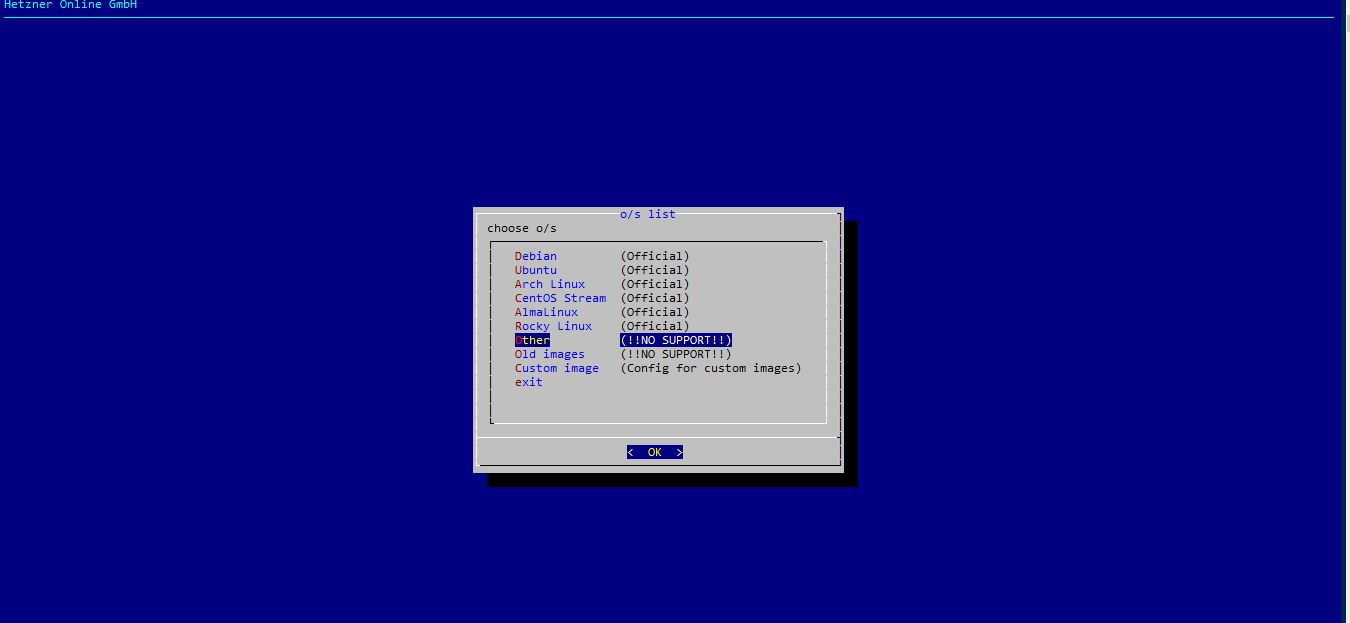
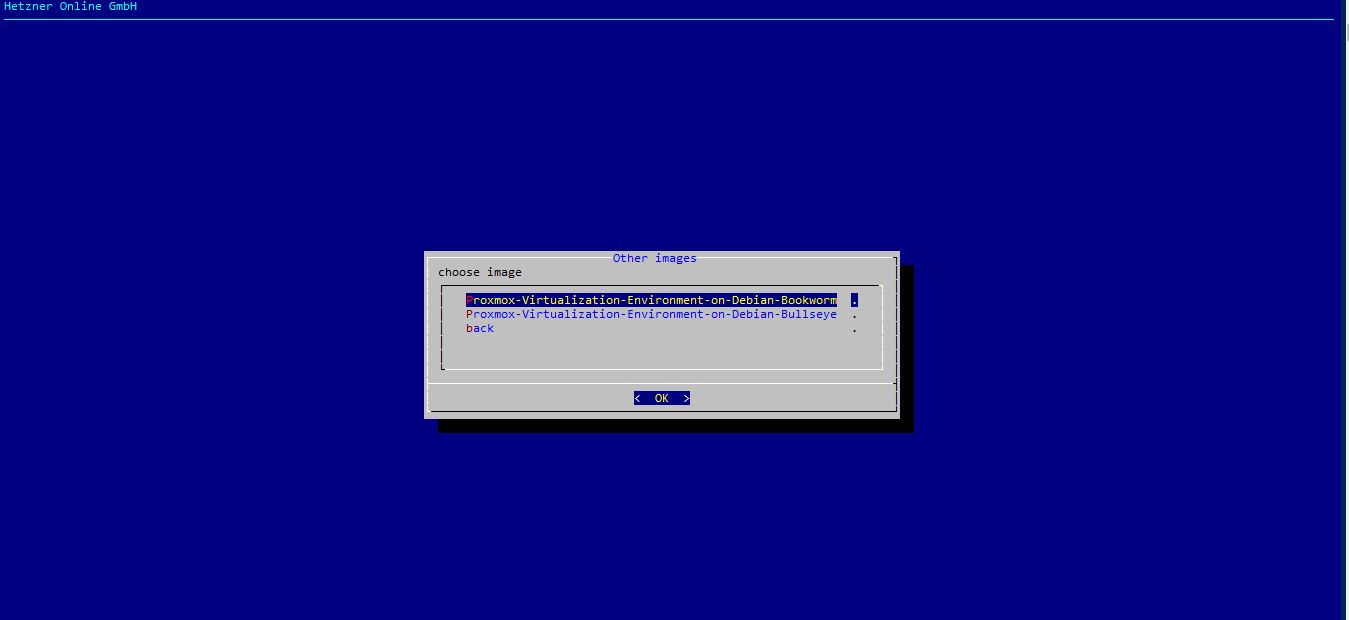
installimage - Pick “other” and then select the proxmox bookworm variant.
- Update the settings with the following (I got this information from medium blogpost: https://medium.com/@artem_lajko/setup-ve-with-proxmox-on-hetzner-single-mode-6b76061efcdb):
1.
FROM:
SWRAIDLEVEL 1
TO:
SWRAIDLEVEL 0 (to use all Storage sda+sdb)

2.

FROM:
HOSTNAME Proxmox-Ve.localhost
TO:
proxmox-single.lab.local (you can call it what ever you want)

3.

FROM:
PART /boot ext3 512M
PART lvm vg0 all

LV vg0 root / ext3 15G
LV vg0  swap swap swap 6G

TO:
PART /boot ext3 512M
PART lvm vg0 all

LV vg0 root / ext3 100G
LV vg0  swap swap swap **32**G  --> (available RAM * 1/2)
LV vg0 data /var/lib/vz ext3 400G --> (Remaining memory after deduction of root for storing images and containers)
- If you haven’t added a password to the host system yet you’ll need to.
passwd
- Open a browser and go to the proxmox web interface at https://hetzner-host-ip:8006/
- enter the user name “root” and the password you set in the previous step.
- Enable packet forwarding on the host by opening the /etc/sysctl.conf file and uncommenting the following line:
net.ipv4.ip_forward=1 net.ipv6.conf.all.forwarding=1 - We’re going to need a network bridge for our proxmox vms to be able to connect to each other and the outside world. Note: We using the subnet 192.168.200.0/24 for our network. This was an arbitrary choice and is up to you to change. The main thing is that it doesn’t overlap with the subnet behind your fritzbox.
vim /etc/network/interfaces
- add the following to the end of the file:
auto vmbr99
iface vmbr99 inet static
        address 192.168.200.1/24
        bridge-ports none
        bridge-stp off
        bridge-fd 0
        up ip route add <fritzbox subnet>/24 via 192.168.200.11 dev vmbr99

    post-up   echo 1 > /proc/sys/net/ipv4/ip_forward
    post-up   iptables -t nat -A POSTROUTING -s '192.168.200.0/24' -o enp0s31f6 -j MASQUERADE
    post-down iptables -t nat -D POSTROUTING -s '192.168.200.0/24' -o enp0s31f6 -j MASQUERADE
    post-up   iptables -t raw -I PREROUTING -i fwbr+ -j CT --zone 1
    post-down iptables -t raw -D PREROUTING -i fwbr+ -j CT --zone 1
- Save, exit and reboot the system.
- navigate back to the proxmox webui https://hetzner-host-ip:8006/
-
Download the ubuntu template for our dhcp and wireguard server. local (Proxmox) -> CT Templates -> Ubuntu Server 22.10
-
Now setup the dhcp server. Create a new CT from the template. Use all the default settings, set a static ip of 192.168.200.2/24, select our vmbr99 network and set the server hostname to “dhcp”.
- ssh onto the newly created dhcp server and run the following:
    apt update && apt upgrade -y
    apt install isc-dhcp-server -y
- Next edit the /etc/dhcp/dhcpd.conf file and add the following to the end of the file:
option domain-name-servers 8.8.8.8;
subnet 192.168.200.0 netmask 255.255.255.0 {
  range 192.168.200.10 192.168.200.199;
  option routers 192.168.200.1;
}
default-lease-time 600;
max-lease-time 7200;
ddns-update-style none;
- Run the following commands:
systemctl enable isc-dhcp-server
systemctl restart isc-dhcp-server
- Create another CT from the Ubuntu template we downloaded for the wireguard server.
- You can use all the default settings, set the server hostname to wgserver, set the password to something secure. You can use the same network interface as the dhcp server.
- Once created, start it and go to the console.
- Install wireguard.
apt-get update && apt-get upgrade -y
apt-get install wireguard -y
- Create the keys for both the wireguard and the fritzbox
wg genkey > wireguard.key wg pubkey < wireguard.key > wireguard.pub wg genkey > fritzbox.key wg pubkey < fritzbox.key > fritzbox.pub - Create the wireguard file at location /etc/wireguard/wg0.conf with the following contents:
# local settings for proxmox Host
[Interface]
PrivateKey = <the key in wireguard.key>
Address = 10.0.0.2/32
ListenPort = 51822

# IP forwarding
PreUp = sysctl -w net.ipv4.ip_forward=1

# remote settings for fritzbox Host
[Peer]
PublicKey = <the key in fritzbox.pub>
Endpoint = <fritzbox dyanamic ip>:59741
AllowedIPs = 10.0.0.1/32, 192.168.178.1/24
Note: Normally comsumer fritzboxes don’t have a static public ip but you can register with fritzbox and open a url specific to your router that will always resolve to the correct public ip address. More info here: https://en.avm.de/service/knowledge-base/dok/FRITZ-Box-7590/30_Setting-up-dynamic-DNS-in-the-FRITZ-Box/
- Start the wireguard service:
systemctl enable wg-quick@wg0.service
systemctl start wg-quick@wg0.service
wg-quick up /etc/wireguard/wg0.conf
- ssh onto the proxmox server again, not the vm we created, and edit the interfaces file again.
vim /etc/network/interfaces
- add the following to the end of the file:
    post-up iptables -t nat -A PREROUTING -i enp0s31f6 -p udp --dport 51822 -j DNAT --to <wireguard vm ip>:51822
    post-down iptables -t nat -D PREROUTING -i enp0s31f6 -p udp --dport 51822 -j DNAT --to <Hetzner IP>:51822
-
save exit and restart the server (you may also need to restart the vms if you have not set auto reboot on restart).
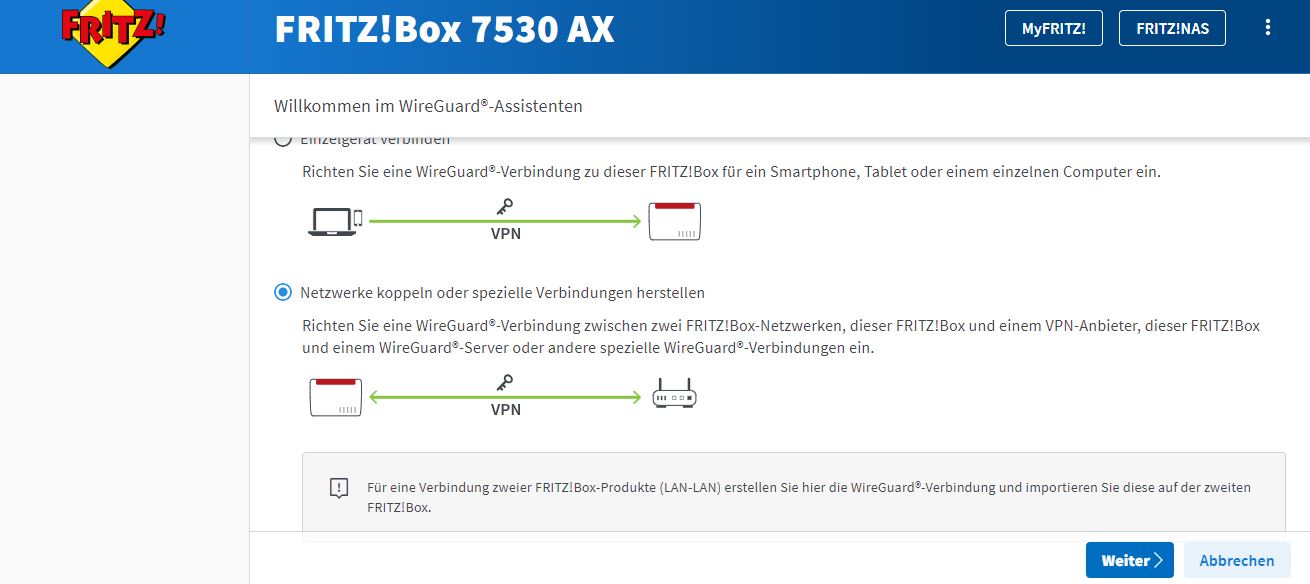
- Now we need to edit our fritzbox wireguard client to be able to connect to our Hetzner server.
- browse to http://fritz.box on you home network.
- go to the wireguard tab and add a new connection.
- Upload a wireguard configuration file with the following contents:
# remote settings for proxmox Host
[Peer]
PublicKey = <the key in wireguard.pub>
Endpoint = <Hetzner IP>:51822
AllowedIPs = 192.168.200.0/24,10.0.0.2/32
PersistentKeepalive = 25

# local settings for fritzbox Host
[Interface]
PrivateKey = <the key in fritzbox.key>
Address = <fritzbox-internal-ip>/24
ListenPort = 51821
DNS = <fritzbox-internal-ip>
DNS = fritz.box
Note: Make sure to enter your fritzboxes ip address in the Address section. This actually doesn’t conform to the wireguard standard implementation. It seems fritzbox has a non standard implementation of the wireguard protocol.
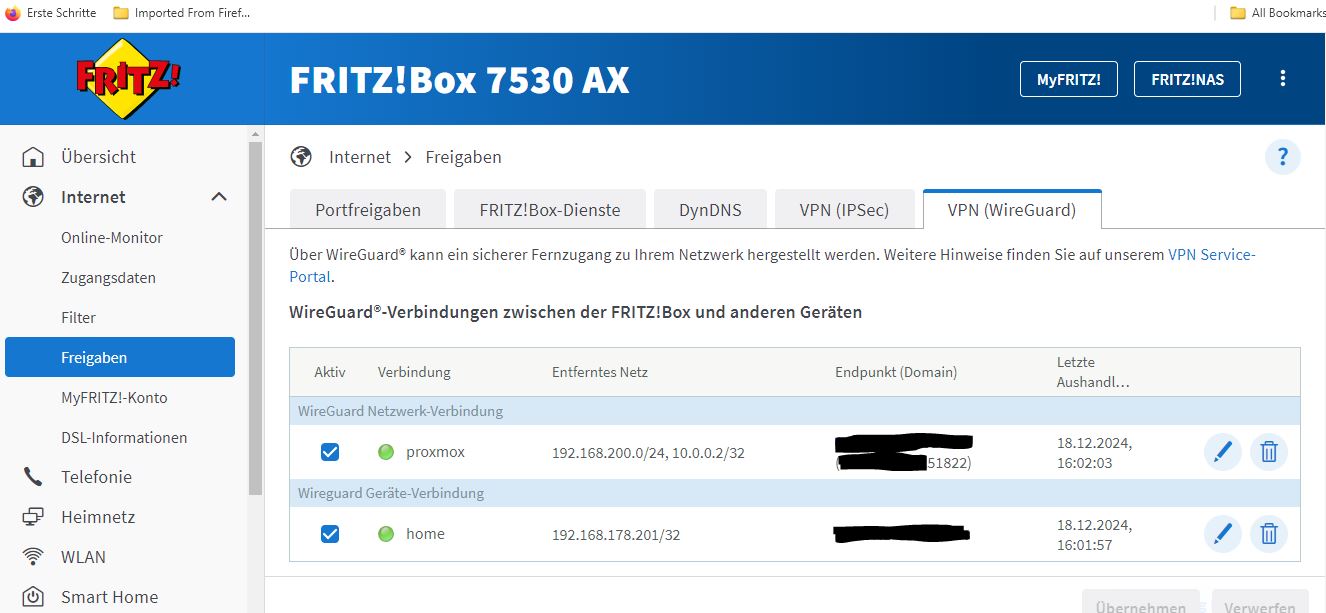
- All going well you should see a green light in the fritzbox wireguard dashboard for the hetzner connection..
- you can try to ping the dhcp server or wireguard server from your home network:
ping 192.168.200.2
ping 192.168.200.11

